This is part 1 of a four-part series. The index post is here. Parts on Flux + SOPS, the Tailscale saga, and finally Grafana will follow.
Why bother
I’d been running my homelab on Docker Compose for about a year. It was fine. It was, in fact, more than fine: the stacks were in git, Dockhand redeployed them when I pushed, and the box had been up for months at a time. There was no thing I was trying to do that the existing setup couldn’t do.
Which is roughly the worst possible time to add Kubernetes. The honest version is:
- I wanted to learn it properly. I’ve been having a blast building up my homelab so far, and wanted to keep taking this forward. And I’m increasingly wondering if maybe a career change in this direction may be wise given my continued frustrations with academia…
- I wanted dynamic storage. Docker volumes are fine for one host; they’re not great when you start wanting “this service should be schedulable to either node, with persistent state”. For that you need a CSI driver, and CSI lives in Kubernetes-land.
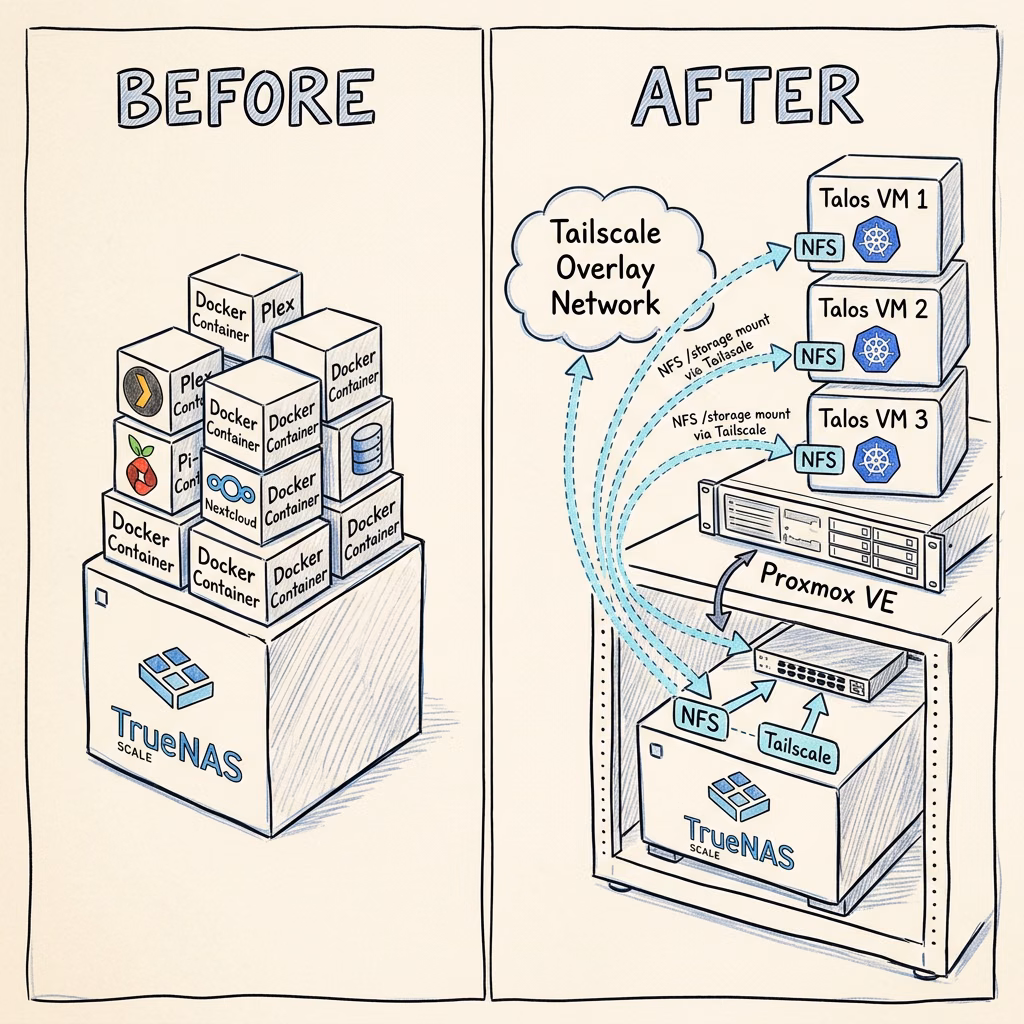
- I wanted somewhere to run things that aren’t a good fit for a TrueNAS server. Home Assistant, monitoring, the odd one-off, they don’t all want to live next to my photos and TV shows.
It has also become, somewhat embarrassingly, a hobby. I am told this is allowed.
Why a separate Proxmox host
The first thing I had to decide was where the cluster would live. There were three options:
| Option | Pros | Cons |
|---|---|---|
| Apps on TrueNAS Scale (Kubernetes-ish under the hood) | No new hardware, already there | Limited control, weird abstraction, less opportunity to learn! |
| Bare-metal Talos on a Mini PC | One less abstraction layer, very fast | One physical box = one node, and I want to play with multi-node |
| Proxmox on a Mini PC, Talos VMs on top | Three VMs on one Mini PC, snapshotting, easy node teardown | Extra hypervisor layer, slightly more to maintain |
I went with Proxmox. The deciding factor was that I knew I’d want to nuke and recreate the cluster several times while learning, and being able to snapshot a known-good VM and roll back to it is so much faster than re-imaging hardware. The extra hypervisor layer is real overhead, but on a quad-core Mini PC running mostly quiet services it doesn’t matter.
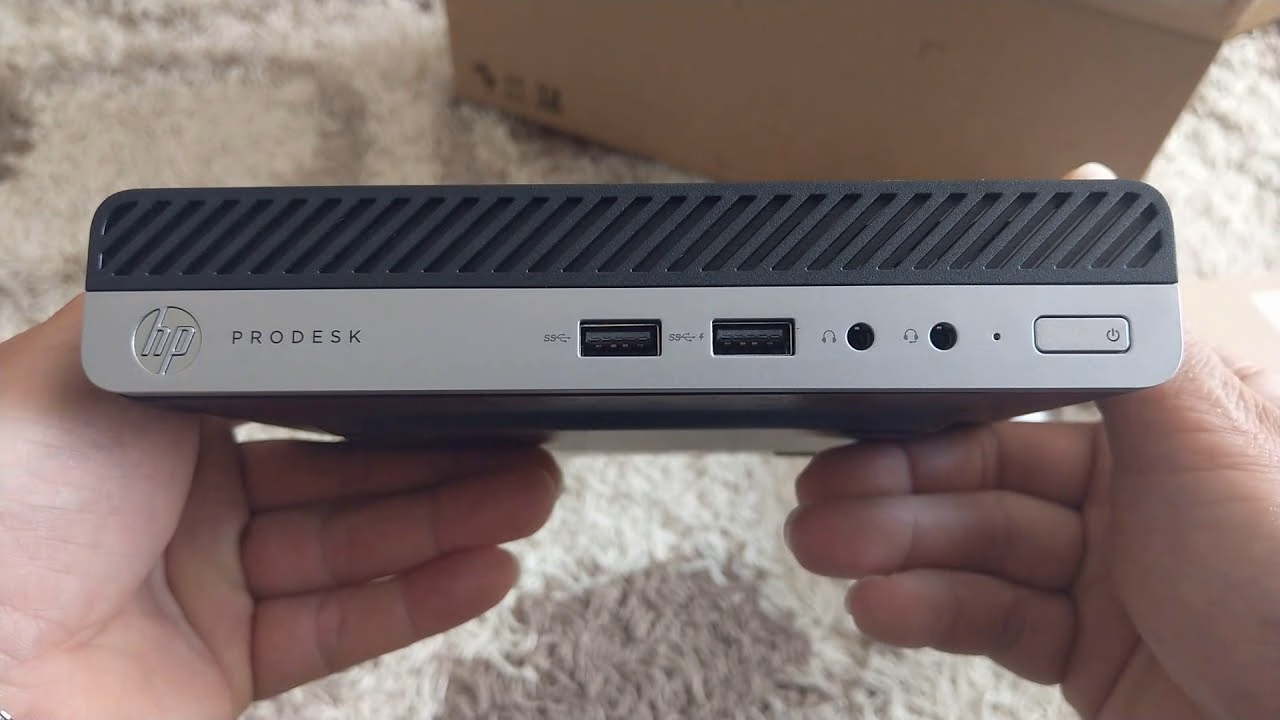
The hardware itself is an HP ProDesk 400 G5 Mini, it’s second-hand, quiet and sips power. It resides locally, and so would demand Tailscale shenanigans to use the TrueNAS server for storage, but more on that and the many headaches it caused me in a later post.
Why Talos
So, as a reminder: I am a total beginner when it comes to Kubernetes. I’m doing this entire bare-metal cluster build as a learning exercise.
Since life would be boring if it were easy and I like a challenge, I decided to try and jump right in the deep end with professional tools.
When you decide to build a cluster from scratch, the first hurdle is choosing the underlying operating system. The honest truth is I didn’t really know too much about the different approaches at first. The standard advice seemed to be: install Ubuntu or Debian, SSH into the machines, install containerd, and then bootstrap Kubernetes using something like k3s or kubeadm.
With a bit of digging, I stumbled across Talos Linux. And it completely changed how I think about infrastructure. I had heard of the classic cattle VS pets philosophy, but Talos is basically the plutonic ideal of this idea. Talos is a modern OS built specifically for Kubernetes, and it takes the concept of reproducibility, something I am hugely passionate about, to its absolute logical extreme.
Here is what makes it so brilliant:
- No SSH, No Shell: This blew my mind at first. There is no SSH server running on Talos nodes. There isn’t even a bash shell! If you plug a monitor into a Talos node, you just get a stream of logs.
- 100% API-Driven: Because there’s no shell, you manage everything via an API using their command-line tool (talosctl). If you need to reboot a node, check disk usage, or pull logs, you do it remotely through the API.
- Immutable & Ephemeral: The entire OS runs from a squashfs image in memory. It is entirely immutable. All of your configuration is defined in a single YAML file.
How does it compare?
With a standard Linux setup, your nodes are essentially “pets”. You have to patch the OS, run apt-get update, worry about rogue packages, and make sure host-level dependencies don’t conflict with Kubernetes. It’s the infrastructure equivalent of a messy, un-versioned R script.
With Talos, the OS and Kubernetes are tightly coupled and treated like “cattle”. If a node gets into a weird state, you don’t SSH in and try to fix it; you just reboot it, and it comes back up perfectly clean. Upgrading the cluster is as simple as sending an API request with the new OS image version. It gracefully drains the node, updates the OS and K8s components, and reboots in minutes.
By pairing Talos with Flux for GitOps, I’ve achieved a setup where my entire cluster, from the bare-metal OS configuration all the way up to my application deployments like Prometheus and Grafana, is entirely declarative and lives in version control. It feels like I’ve finally achieved true reproducibility, but this time for an entire server rack instead of a dataset!
The exact set of system extensions baked into your installer image is determined by a single YAML file (schematic.yaml) that you POST to the Sidero Image Factory, and you get back a deterministic SHA. Mine currently looks like this:
customization:
  systemExtensions:
    officialExtensions:
      - siderolabs/iscsi-tools
      - siderolabs/qemu-guest-agent
      - siderolabs/tailscale
      - siderolabs/util-linux-tools
The same file always produces the same image. If I want to add an extension, I edit the file, regenerate the schematic, and roll out a new installer image to each node.
I’m not (yet) using Omni, the SaaS / self-hostable Talos management plane. For a three-node cluster the raw talosctl workflow is fine, and there’s something to be said for staying close to the underlying primitives while you’re still learning.
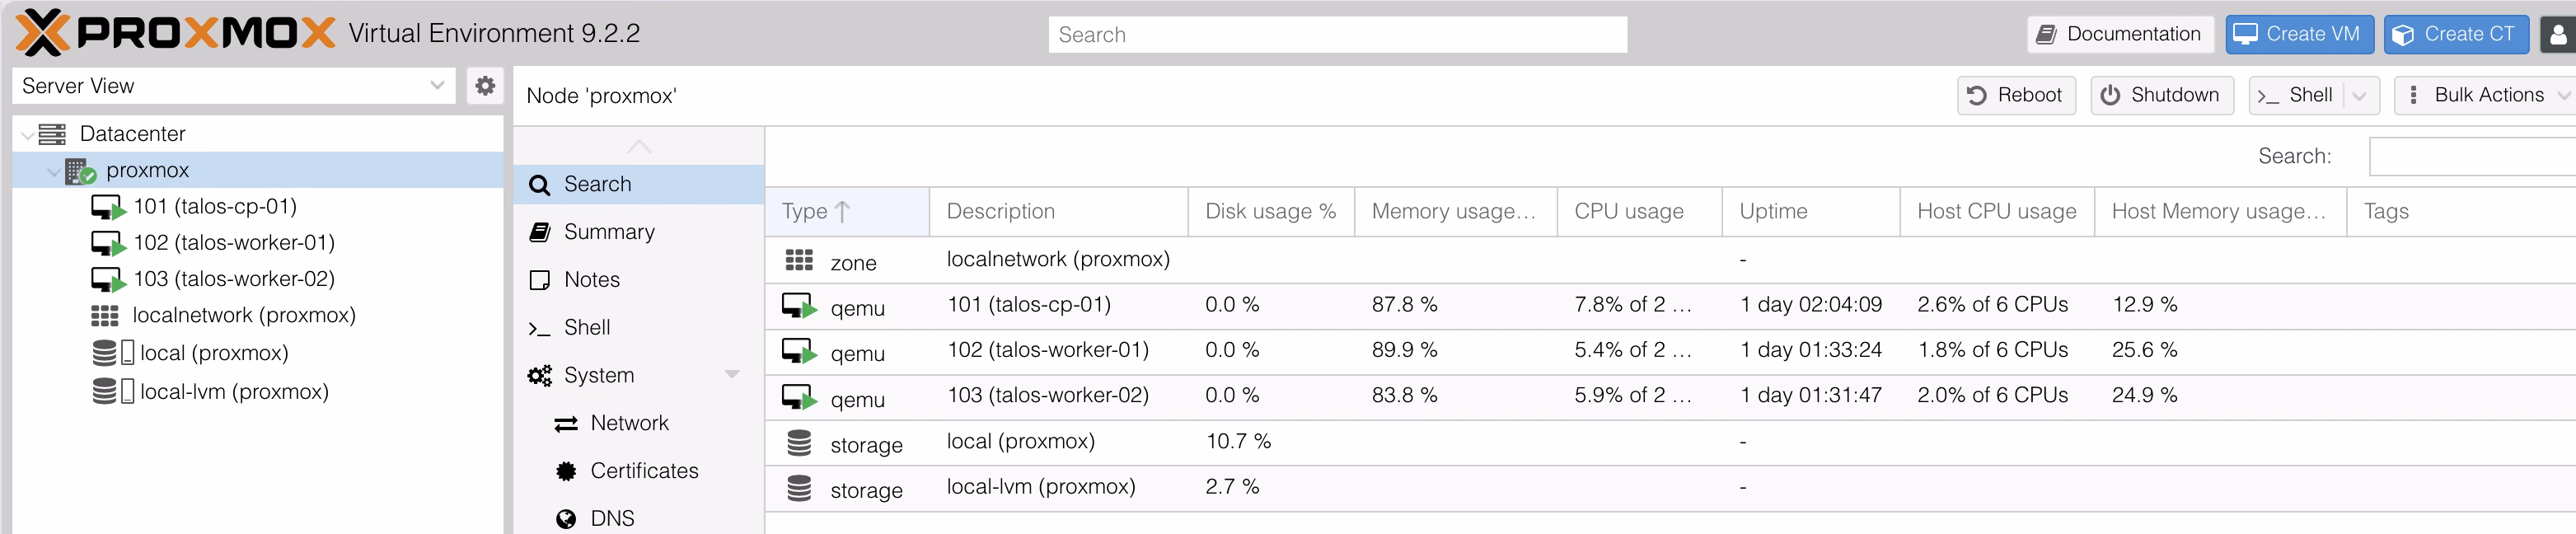
The first cluster came up. The second one came up correctly.
I won’t pretend the bootstrap was smooth. The first cluster I brought up worked in the sense that kubectl get nodes returned three Ready nodes; it didn’t work in the sense that I’d made a series of small choices I later regretted.
On that note, an important point:
- Give your nodes static IPs! Talos doesn’t mind, but you will, every reboot risks reshuffling which IP goes where, and your
talosconfigwould drift out of date.
Some other learnings:
- Use a sensible cluster name (
homelab, revolutionary!). - Saved my
controlplane.yaml,worker.yaml, andtalosconfigintoproxmox/in the homelab repo: gitignored, because they contain PKI material and shouldn’t ever be committed, but at least kept together with the rest of the config and backed up to my password manager.
The repo’s .gitignore has proxmox/ listed precisely because I’d rather have a deliberate “this is local-only” pattern than hope I remember not to git add -A one day.
What you have at the end of Part 1
Three Talos VMs, a healthy cluster, and a talosconfig / kubeconfig pair you can use to talk to it. No workloads yet, no GitOps, no storage, no monitoring. Just a cluster.
Which feels like the easy bit, in retrospect. The “real” work starts when you try to actually run something on it, and want that something to be defined in git rather than imperatively kubectl apply-ed. That’s Part 2.